
Pasteles: The Heart of the Holidays and the Legacy We Carry
Every family has that one dish, the one that doesn’t just show up during the holidays, it announces the holidays. For us, that dish is Puerto Rican Pasteles. If they’re not on the table, it simply isn’t Noche Buena. The air feels different when the pasteles are boiling, the house smells like memories, and suddenly everyone is lingering a little longer in the kitchen, waiting for that first bite.
And because this dish means so much to so many of us, one of the questions I get asked the most is:
“Ciji, when are you going to make a pasteles tutorial? Can you show me how to make them?”
After countless requests, gentle nudges, and “girl, please just film it!” messages, I finally partnered with my friends at Walk-In Talk Media to create something beautiful; a full, step-by-step pasteles tutorial with a recipe card and stunning visuals for my visual learners, because let’s be honest… some of us need to see the fold, feel the rhythm of the process, and watch the masa come together to really understand it.
And I wanted this tutorial to feel like you’re sitting in my kitchen, like I pulled you up next to the sink, handed you a banana leaf, and said, “Mira, don’t worry. I’ll show you. You’re going to learn.”
Preserving What Our Ancestors Taught Us
I’m someone who feels deeply—deeply—about preserving ancestral cooking methods. These dishes aren’t just recipes; they’re acts of remembrance and resilience. They’re how we honor the hands that fed us, the stories that shaped us, and the people who made sure culture wasn’t lost in the shuffle of generations.
That’s why, when I created this tutorial, my intention was simple:
No one gets left behind.
Whether you’re making your very first batch or you grew up watching your mother, Titi, or abuela do this by heart, I wanted you to feel supported every step of the way. Puerto Rican pasteles can look intimidating, but they’re not impossible. With patience, love, and clear guidance, you can make them too. And trust me, once you do… you’ll understand why we guard this tradition so fiercely.
Titi’s Love, Wrapped in Banana Leaves
This recipe… this moment… is personal.
My Titi Lucy is the one who taught me how to make Puerto Rican pasteles. It’s one of the most precious gifts she’s given me, and I carry the memory of those lessons with so much tenderness. What makes it even more special is remembering her teaching not only me, but my daughters, her great-nieces, her hands guiding their little hands, showing them how to fold, how to tie, how to feel when the masa is just right.
This is her recipe.
Her legacy.
Her way of making sure the tradition doesn’t fade after she’s gone.
And she has succeeded because every time I stand over a pot of gently boiling pasteles, every time I soften banana leaves over the stove or season the guisado just right, I hear her voice, patient and loving, telling me, “Eso. Just like that.”
Titi, thank you.
For your time, your love, your guidance.
For teaching me.
For blessing my daughters with the same love and care you showed me.
For giving us this recipe that will outlive us all.
I am so grateful I married your nephew… because that’s how I inherited you.
And I love you more than these words can ever say.
Pasteles Can Be A Tradition for You, Too
As I find myself stepping deeper into my own Tía/Titi era, I realize that this tradition isn’t just for my kids, it’s for you and yours, too. That’s why I’m sharing it with such intention. If making pasteles has ever felt overwhelming, I’ve created this tutorial so you can finally say:
“Yes, I made them. I made those pasteles.”
Watch the short video, follow the recipe card, pause where you need to, and replay what you want to see again. This is your safe space to learn. And when your batch is done… please leave a comment, tell me how they came out, and share your feedback. I want to hear about your celebrations, your wins, your first attempts, and about your memories.
Because food… this food… connects us.
And Puerto Rican pasteles?
They bind families, they honor ancestors, and they turn ordinary days into occasions.
Welcome to the tradition.
I’m so glad you’re here.
iBuen provecho!
Please Allow Me A Moment of Gratitude
To Carl, John, and the entire Walk-In Talk Media team—thank you.
Thank you for creating space for me to share my culture, my mission, and my passion.
If you’re not already following @walkintalkmedia, now’s the time. Their platform is a love letter to the hospitality industry—featuring real stories, real chefs, and raw, unfiltered conversations that truly matter.
Find Walk-In Talk Media on:
YouTube, Apple Podcasts, Spotify, LinkedIn, Facebook, Instagram, or check out their website to learn more.
Find Ibis Images Photography on:
Instagram, LinkedIn, Facebook, or visit their website to learn more.
All products featured on Domestic Gourmet are independently selected. I may earn an affiliate commission when you buy through links on this site.
Gather your pasteles supplies
Before you begin wrapping, set out your paper and twine. Our pasteles paper and cotton twine bundle brings both together: 1 lb of 12 × 18-inch paper and 800 ft of cotton twine.
Already have twine? Choose paper on its own. For the aceite de achiote in this recipe, explore our ready-to-use annatto oil. The full recipe below calls for 2 lb of paper, so plan for two 1 lb packs. Banana leaves and food ingredients are separate from the paper-and-twine bundle.
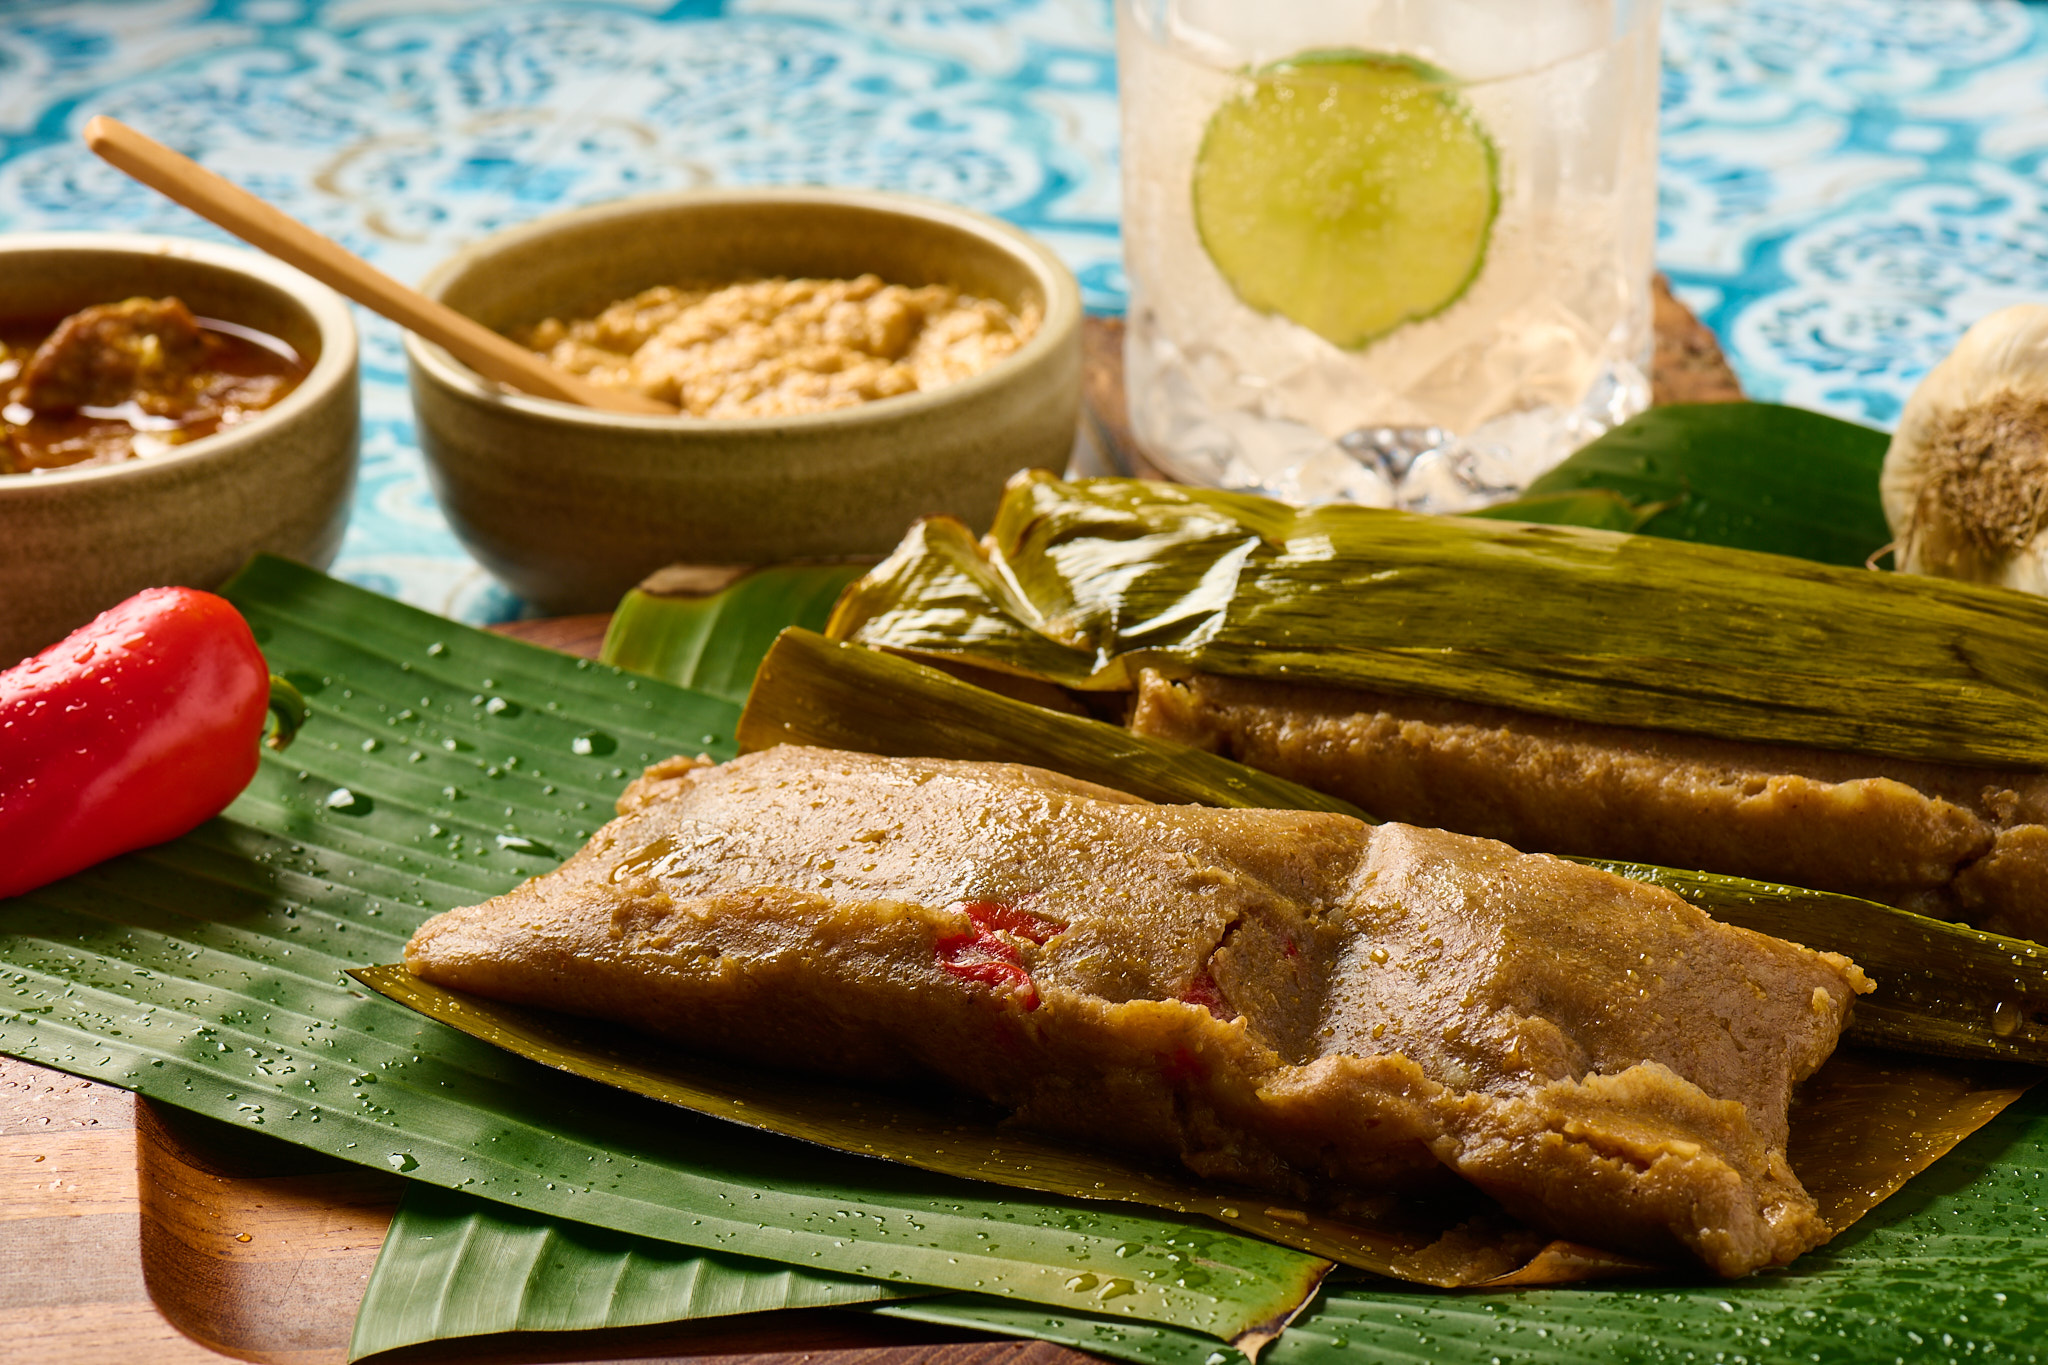
Authentic Puerto Rican Pasteles
Equipment
Ingredients
For The Pasteles
- 2 lbs Pasteles Paper
- 1 roll Butcher's Twine
- 40 Green Cooking Bananas Also known as "no gas" bananas
- 5 lbs Yautia Also known as malanga or tarot
- 2 lbs Banana Leaves If you have a banana tree, cut three branches off. Otherwise, these can be found in the frozen food section of the Latin or international grocery store.
- 1 bottle Domestic Gourmet Annatto Oil
- 3 7oz jar salad olives with pimientos
- 2 16oz jar roasted red peppers
- 1 bottle Domestic Gourmet Sazón
- 1 bottle Domestic Gourmet Adobo
For The Sofrito
- 3 green bell peppers
- 3 Spanish onions can be substituted with yellow onions
- 1 head garlic
- 1 bunch cilantro
- 1 bunch culantro
- 8 oz cachucha peppers Also known as Ajicitos or sweet peppers
For the Puerco Guisado (Pork stew)
- 5-6 lb bone-in pork butt (shoulder) can be substituted with beef chuck, chicken, or garbanzos for a vegetarian option
- 16 oz white vinegar
- 1 lb potatoes
- 2 lb carrots
- 2 tbs Domestic Gourmet Organic Annatto Oil (Aceite de Achiote)
- 2 tbs Domestic Gourmet Organic Adobo
- 1 tsp Domestic Gourmet Organic Sazón
- ¼ cup dry sherry can be substituted with a dry white wine or vino seco
- 1 cup Puerto Rican Sofrito
- 4 oz tomato sauce
- 2 bay leaves
- 6 cups water
Instructions
Make the Sofrito
- Separate and peel the head of garlic.Peel the onions.Remove the stems and seeds from the peppers.Wash and dry the cilantro and culantro.
- In a food processor, purée the peppers, onions, garlic, cilantro, and culantro with enough annatto oil to blend.
- Pour into a medium-sized mixing bowl and set aside.
Prepare the Puerco Guisado (the pork can be substituted with beef or chicken)
- Using a chef's knife, debone the pork butt, cube the meat into 2" cubes, and place pork cubes into a large mixing bowl.
- Rinse the pork with vinegar and pat dry with paper towels.
- Season with adobo, sazon, and annatto oil, massaging the marinade into the meat.Best if seasoned the night before.
- Sear the meat in a hot pot over medium-high heat, browning each side of the cubed pork. Do this in batches to avoid overcrowding the pot.Place the seared pork on a separate plate until all of the pork has been browned.
- Once all the pork has been browned and removed, lower the heat to medium, add the wine, and using a wooden spoon, scrape the browned bits from the bottom of the pan until the liquid has reduced and all of the browned bits have been incorporated.
- Add the sofrito and saute until fragrant and softened.Add the tomato sauce and mix to incorporate.
- Add the seared pork to the pot and mix well, making sure it's evenly coated with the sofrito.
- Add 6 cups of water and two bay leaves.Raise the temperature to medium-high and bring to a boil.
- Once boiling, reduce the heat to medium-low to simmer and cover with the lid. Leave covered for 1 hour.
- When the hour is up, check the pork for tenderness. If the pork falls apart easily with a spoon, it is ready. If not, cover with the lid and check again in 30 minutes.Once tender, remove 4 cups of the broth and set aside.Remove the lid halfway and add the cubed potatoes and carrots.
- Continue simmering and reduce the liquid until it thickens into a sauce that coats the spoon, but not as thick as a gravy. (The sauce will continue to thicken into a perfect gravy as it cools.)Taste and adjust seasoning as needed, adding more adobo if necessary.
- Remove the pot from the burner, let it cool to room temperature, and then refrigerate immediately.Best to make this a day ahead.
Prepare the Masa for the Pasteles
- Add water to one large mixing bowl.
- Put on gloves.Using a chef's knife, cut the ends off the green bananas. Afterward, slice the peel from top to bottom.Peel the bananas and place them in the bowl of water.
- Peel and cube the yautia and place in the bowl of water.
- In the food processor, blend the bananas and yautia, removing any small chunks that may be left behind in the masa.Work in batches, emptying the masa into the second large mixing bowl until you have puréed all of the bananas and yautia.You can set aside any chunks you find in the masa and, if you have enough, process them again; otherwise, discard them into the trash.
- Mix in 1½-2 cups of annatto oil.Add about 4 cups of broth to the masa; be careful not to make it soupy.Add 1 tbsp of Sazón, 3 tbsp of Adobo, and taste. If it's under-salted or bland, add more adobo until it's salted to your liking, but the masa needs to taste flavorful.
- Cover with plastic wrap. Please note, this masa will oxidize and turn brown. To help with that, place the plastic wrap directly on top of the masa, then remove any air bubbles. You want the plastic wrap touching the masa.Place the masa in the refrigerator until you're ready to assemble the pasteles.This can be done a day in advance.
Prepare to Assemble the Pasteles
- Slice the roasted red peppers into strips and place them in a bowl with a fork.
- Disinfect and clean the kitchen sink.Cut the banana leaves into thick strips, measuring at least 5" x 7". Trim off any dry or brown edges.In the kitchen sink, wash the banana leaves by rinsing them with water and rubbing any grit off with your hands.
- Lay them to dry on clean kitchen towels.Using an additional kitchen towel, wipe them completely dry.
- Turn the stove burner on high heat.
- Carefully place the banana leaf over the burner to soften and release its aromatic oils. The leaf will turn bright green, and that's when you know to flip it and do the other side. Be careful not to burn the leaves; you want them to stay green.Set aside the softened banana leaves on a plate for later.You will repeat this process until you have processed all of the leaves.
- Set up an assembly line at the kitchen table with a stack of pasteles paper, a plate with the banana leaves, a small bowl of annatto oil, a small bowl of olives, a bowl of red peppers, butcher's twine, and scissors.
Assembling the Pasteles
- First, lay a sheet of the pasteles paper down in front of you.
- Then, lay a banana leaf right in the center of that sheet.
- Using a teaspoon, ladle annatto oil onto the leaf and using the back of the spoon, spread it evenly to cover the leaf edge to edge. Just coat the banana leaf, not the paper.
- Spread a heaping spoonful of masa onto the leaf, roughly ⅓-½ cup.
- Add a couple of tablespoons of the guisado on top of the masa.
- On top of the meat, add a few olives and a strip or two of the red peppers.
How to Fold the Pastel
- Leaving the leaf in the center of the paper, grab the outer edges of the paper, opposite you, and pull those edges towards you to meet the edges closest to you. This should look like it's folded perfectly in half, longways.
- With the long edges aligned, fold them back about a half an inch, and then back again another half an inch. Continue this process until you reach the pastel, and then roll that folded edge until it lies right along the middle of the pastel.
- Now that the pastel is completely folded longways, it's time to fold in the sides. Using the side of your palm, smooth the paper, pushing the pastel from each side towards the middle. Then, tuck one end of the paper into the other, like an envelope.
- Cut a long piece of butcher's twine, about 30", and lay it flat on the table in front of you in a straight line.
- Lay the wrapped pastel right on top of the middle of the string. The string should sit crosswise under the center—like a belt waiting to be buckled.
- Bring both ends of the string up and over the pastel. Tie one simple knot, think of the first step of tying a shoelace. Don't tighten too hard yet; just anchor the bundle.
- Take the loose ends of the string and pull them along the long edges of the pastel. Flip the pastel over gently.Tie another simple knot on the opposite side.Now the pastel has its first "belt"
- Without cutting the string, bring both ends around the shorter sides of the pastel.Cross the strings so they make a clear X. This is the iconic "cruzado" shape, also known as the Double-Cross Tie.Flip the pastel again and tie another knot to secure this second direction.
- Tie one more firm knot on top.You want it tight enough to hold during boiling, but not so tight that it tears the paper.
- Your pastel should now look like a neat, rectangular package with: ° A secure knot on each side° Two looping “belts”° A crisp X shape across the topIt’s ready for the boiling pot!
To Cook and Store Pasteles
- Fill a large pot with water ⅔ of the way to the top. Add the pasteles and boil for 45 minutes.Make sure not to overcrowd the pot, as this may prevent the pasteles from cooking all the way through.
- Store any pasteles, cooked or uncooked, in the refrigerator for up to 3 days or freeze for up to 6 months.If freezing, wrap each individually in aluminum foil and store in a freezer bag until you're ready to consume. If frozen, boil for 45 minutes to cook before serving.
Notes
Did you make this recipe?
Please let me know how it turned out for you! Leave a comment below, tag @domesticgourmet on Instagram, and hashtag #domesticgourmet.


Great post! I’m going to share this with a friend.
Thanks for making this so reader-friendly.
Thank you for putting this in a way that anyone can understand.
What an engaging read! You kept me hooked from start to finish.